The SWMC Wiki is currently under review.
Penallta
GR138948
Contents
PREAMBLE
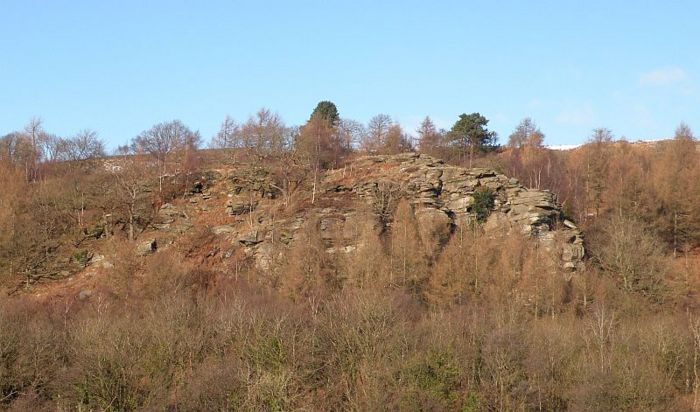
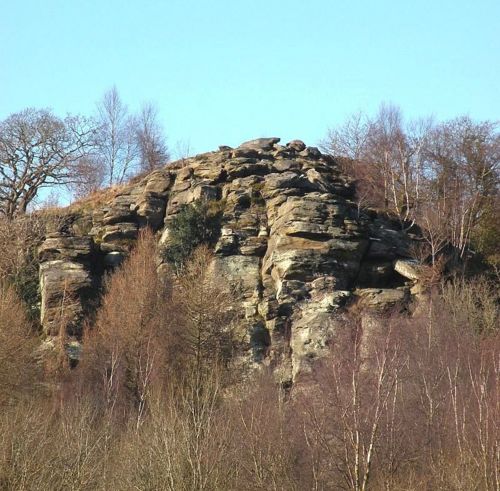
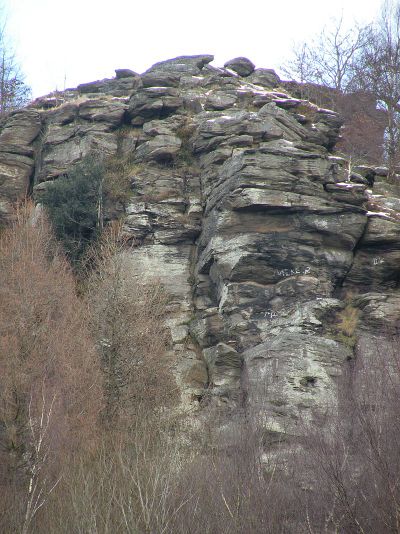
A good quality sandstone outcrop, probably the first scene of early sandstone exploration. The friction is excellent and the crag dries rapidly after rain. Protection can be a bit sparse on the harder routes and some of the flakes in the ‘Scabs’ and ‘Klingon’ area are a little brittle. Although there is currently no topo, the starting locations of most routes have their initials painted in white.
ACCESS
If on foot, from Ystrad Mynach train station proceed down onto the main road, turn left, and walk up the road for 200m. The crag is now visible over on the right and is accessed by the obvious track leading leftwards across the fields. If approaching by car from Ystrad Mynach, pass under the railway bridge on the A472 and take the first right which leads into a housing estate. Take the first left into Griffith Street and park on the rough road on the right-hand side at the end of the street. An obvious path leads left across the fields to arrive at the crag in about 300m.
THE ROUTES
The crag has a somewhat scrappy middle section, left of which is the prominent undercut pinnacle taken by Scabs.
This pinnacle splits the two upper amphitheatres. Right of the central section is big slabby face capped by a large roof.
Left of the pinnacle is a sharply undercut buttress and a final small bay. The routes are described from left to right,
starting from this bay.
Far Left Hand Bay
- Limbo 8m VS,4c *
The short arete at the extreme left-hand side of the crag, on its left.8m. - The Leap 8m HVS,4c
The wall immediately right of the arete, finishing up the left-hand side of the arete.8m. - Cornflake 11m HVS,5a
The wall immediately to the right.11m. - Afterthought 14m HS,4b
The obvious overgrown corner, swinging left into the crack at the top, which provides the only real difficulty. Unknown Pre-1978 - Cadet’s Route 12m VD
The wall just right of the corner, exiting via a crack in the wall above.12m.Unknown Pre-1978 - The Wolery 14m S
Start immediately left of Spiney Norman and climb the wall just left of the crack, to finish up a crack just left of the chimney.14m. - Spiney Norman 14m HS,4c *
Round to the right is an undercut buttress, at the left-hand end of which is a large boulder. Make a bold rockover, and continue up the slab to a generous terrace, stop for a picnic, then finish up the large chimney at the left-hand edge of the shelf.14m. - Anarchia 20m E2,5b
The overhang on the left side wall of the buttress, just right of the Wolery, bold. Finish up on shelves just right of the chimney.C.Parker 00.00.1983 - Rhymney And Cocaine 6m E4,6c *
A very powerful boulder problem up the vague flake halfway along the upper terrace (gained from Y-Fronts) PR, with long sling. G.Ashmore 28.09.1997
Lower Left Hand Amphitheatre
- Y-Fronts 21m S
The right-hand side of the undercut buttress marks the start of the lower left hand amphitheatre. There is an obvious chimney in the left-hand wall. Climb the slab which forms the left side of the chimney until an obvious traverse line leads out left onto the terrace. Finish as for Spiney Norman.
- Split Crotch Variation 18m E1,5b *
Climb the corner right of Y-Fronts directly to the roof and a very wide bridge (the Third Severn Crossing). Swing out left above Y-Fronts, then take the wall above the right hand end of the terrace to an exciting finish on slopers. C.Hurley 00.02.1978
- Maginot Line 9m E1,5b
A poor line. Start up Split Crotch Variation and reach a pocket in the right wall. Use this to swing right to the top of Klingon. A.Sharp 00.00.1976
- Klingon 8m E2,5c *
The blunt arete to the right has a hard start, little if any gear and a dyno off loose flakes to a good flat topped ledge.Slide off into the Upper Amphitheatre to finish.S.Lewis 00.00.1976
- Eeyore’s Gloomy Place 15m VD
Very apt. The dense tropical forest just right of Klingon. Finish up the unpleasant chimney at the left-hand side of the upper amphitheatre.I.Jones Pre-1973
- Pinnacle Chimney 15m D
Start below the tree growing out of the centre of the bay. Follow the steps up to the upper amphitheatre and finish up the chimney directly behind.Unknown Pre-1973
- Dinsdale 15m S
The obvious crack in the right wall. Finish up the right-hand chimney of the upper amphitheatre.I.Jones Pre-1973
- Too Risky 15m VS,4c
As for Dinsdale for 5m to the break, then traverse right to a ledge. Climb up to the huge ledge above the front face of Scabs, and finish either left or right with little interest. T.Penning Pre-1985
Upper Left Hand Amphitheatre
- Hell For Pleasure 9m E1,5b
The left-hand wall of the amphitheatre. C.Court 00.00.1984 - Sheer Pleasure 9m E1,5b
The face immediately right of the righ- hand chimney. T.Penning Pre-1985
Pinnacle Area
- Stitches On Scars 12m E5,6b *
Right of Too Risky on the left hand side of the lower part of the Scabs pinnacle is a jug by a prominent PR held in with 6” nails. Stick Clip this, as many of the holds in the roof are now much looser. Make a huge dyno for the jug, then make hard moves right and up to finish, M.Crocker, R.Thomas 04.03.1989 - Stitches Direct 12m E6,6a *
Start up Scabs, but pull left to gain the base of the arete and finish up this. Very bold. G.Williams 00.00.1997 - Scabs 12m E3,5b **
The most famous route on the crag. Start directly below the main overhang and power up to a tricky step right to a horizontal flake. Move up and left to finish. Please do not place protection this route - the gear will not hold and the crucial flake will be destroyed. P.Littlejohn solo 00.00.1982 - Shriekback 12m E5,6a
Horrid. The roof right of Scabs, via two pockets and a wafer thin flake, to a blind jump for a hold just left of a protrusion just above the lip of the overhang. Slap up again, then move left to finish up Scabs. C.Parker 00.00.1983 - Shag Rat 21m E1,5b
Easy for the grade with the crux low down. Start from a rocky platform on the right of the pinnacle and climb the wall directly behind on good pockets. Mantle out right to land in the upper right amphitheatre, then follow jugs directly up the leaning wall, keeping as near to the left-hand arete as possible. P.Thomas 00.00.1976
Upper Right Amphitheatre
- The Last Waltz 12m D
From the corner of the amphitheatre, traverse left out along the ledge to the front of the pinnacle and finish direct. Unknown Pre-1973 - Bold Finger 6m VS,5b *
A superb one move wonder. Take the obvious finger crack through the overhang to exit on the left wall of the amphitheatre. A.Sharp 00.00.1976 - The Sighting 9m VS,4c
The fist-sized crack just left of the corner, surmounting the overhang on a very loose flake. J.Harwood solo 05.04.1978 - The Gibbon 14m S
The large corner-crack of the bay, which is better than first appearances suggest. Unknown Pre-1973 - Sheer Hell 14m E2,5b *
The obvious wall to the right, with an awkward undercut start and a grassy finish. Technical Friend and small RPs useful for the start, Friend 4 useful for the top. J.Harwood 03.10.1975
Central Section
- Sennapod 25m HS,4b
Follow the runnel leading into the right hand amphitheatre from the base of the crag. Step out right onto a grassy ledge, then climb the arete above. L.Parsons, I.Jones Pre-1973 - The Horticulturalist 25m S,4a
To the right is a short crack, which is followed to a ledge. Douse the whole area liberally with Agent Orange. Proceed up the wall above and head for a tree over on the right. From the tree climb the arete just to the right, taking care with the rock. Unknown Pre-1973 - The Herbiculturalist 25m S
Climb the wall just right of the initial crack of the previous route to a ledge and move left over a bulge to surface at a larger ledge. Climb the corner above, finishing either right or left as the mood takes you. The mantle onto the ledge at 5m is currently under a heap of slag. P.Watkin Pre-1973
The Big Slab
- Free Wall 25m S
Climb the wall just right of the obvious flake crack passing a bulge to reach the large ledge (The Prow). Finish up the corner. I.Jones Pre-1973 - Devils In Hell 25m VD
The obvious flake crack leading up to The Prow. Finish up Free Wall. Unknown Pre-1973 - Direct Finish 9m VS,4c *
From the Prow, make a hard swing up the short right-hand arete. Finish directly up the slab above. I.Jones Pre-1973 - Western Roll/Free World 27m E1,5b **
Climb the centre of the buttress between the two flake cracks at the base of the crag. Continue straight up to the big ledge under the roof. It is possible to wimp out left here (HVS,5a). Old BB. From the BB, make a hard move up left into a groove, 2PRs and climb easily through the roof to a hard move round the lip. Finish direct. M.Crocker - Free World 00.00.1975 G.Lewis - Western Roll 00.00.1975 - Arse Trad Mynach 6m E3,6a
Straight over the roof to the right passing a very old BR and a bendy PR. M.Crocker – A2 Route A2 Pre-1978 FFA G.Ashmore 28.09.1997 - Aaron The Amorous Aardvark 24m S
Start right of Western Roll and climb the wall to the first ledge. Stomach traverse through Western Roll, to join Devils In Hell. Follow this for 5m until it is possible to move right into a diagonal crack. Follow this to a sloping ledge, then go up and right to gain the ledge below Free World. Wander off right. I.Jones Pre-1973 - Pushover 20m VS,4b
To the right are two obvious cracks at 5m. Take the flake crack below and follow the left-hand crack. Gain the finishing ledge via a thinner crack slightly to the left. P.Thomas Pre-1973 - The Pusher 20m HVS,5a
The right-hand crack is tougher. From the top, step right to finish up the obvious crack. I.Jones Pre-1973 - Alley Crack 18m S,4a *
Up and to the right of The Pusher is a pair of less prominent cracks. Gain the left-hand crack via the flake crack right of The Pusher and overcome the intervening bulge. M.McMahon Pre-1973 - Alley Oop 18m S,4a *
The right-hand crack, gained via the short wall below. Unknown Pre-1973 - Thin Chimney Finish 5m HVS,4c *
The way gnarly grim reaper on wheels finish from the large ledge, via the thin chimney to the right of the roof of Free World. Not recommended for bloaters. The reversal of this route is quite hard. Unknown Pre-1973 - Giggler’s Arete 18m E1,5b
Climb the arete to the right of Alley Oop, placing some gear and using the crack of Alley Oop just before the top. Very contrived. J.Harwood 05.04.1978 - Rainmaker 30m VD
Takes the easiest line on this section of rock. Usually done in two pitches. Start at the extreme right-hand edge of the crag below the obvious dirty gully. Swing onto the small ledge and traverse left to the final corner of Pushover. Climb the wall to the left to a large hole and move left to mantleshelf onto the sloping ledge. Belay on the Prow, or continue up the easy corner moving right at the top. Largely superseded by The Higher The Fewer. Unknown Pre-1973 - The Higher The Fewer 35m HVS,4c
A girdle. Climb Alley Oop to the base of the crack, then traverse off and left into the corner. Continue to a tree, then go up to a large ledge and belay. From the belay climb up to a holly, then cross the wall of Sheer Hell, via the obvious break. Finish up The Gibbon. I.Jones Pre-1973
There is also a low level traverse of the crag, from the right hand side as far as Y-Fronts at 5b. This can be extended to the end of the crag at 6a, with the crux being to get past Y-Fronts without trailing your feet on the ground or getting your underpants dirty.


